5 Ways to Dry Herbs
Whether you have some leftover store-bought rosemary from yesterday′s meal of roasted veggies, a garden overflowing with lemon balm, or a large backyard patch of wild stinging nettle, drying herbs is a great option for preserving this abundance for a year-round supply of cooking spices and herbal preparations.
Drying herbs effectively is a key step in getting the most out of your wildcrafting experience! Find five ways to dry herbs below, an excerpt from the online Botany & Wildcrafting Course, which takes students on a captivating voyage through the science of botanical identification and the art of wildcrafting edible and herbal botanicals.
A Guide to Drying your Herbal Harvest
Drying methods depend on many factors, including the herb(s) in question, the plant part(s) to be dried, the temperature and humidity of your drying space, the equipment available, and how the herb(s) will ultimately be used (i.e., home use versus commercial distribution).
Most herbalists will dry their herbs in one or more of the following ways:
Herb Drying Method 1: Outdoors on a clean surface, shaded from direct sunlight
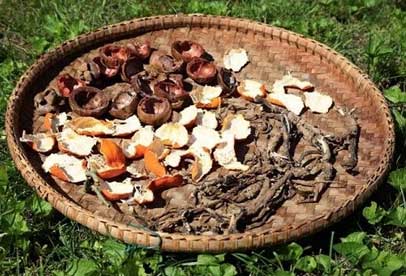
Spread fresh herbs on a tarp, cloth, or other clean surface on the ground. To keep plant material out of direct sunlight, choose a naturally shaded area or create shade with a canopy, shade frame, or hoop house.
Herb Drying Method 2: In layers on drying frames or screens
This method maximizes available space much like an urban skyrise: spread herbs on screens or drying racks that can be stacked on top of each other in a frame. If your drying room is small enough, use a dehumidifier to speed up the drying process (this applies to any indoor drying method, including the next method below).
Herb Drying Method 3: Bunched for hanging or drying in paper bags
Collect herbs into small, loose bundles, and hang from nails or a string (much like a clothesline) in an out-of-the way location away from light. Bundles may be tied with string, twist-ties, or rubber bands (the last option keeps individual stems from slipping out of the bundles as they shrink with drying). Alternatively, bundles may be placed in paper bags to prevent contamination by dust or other particulate matter. When drying herbs in paper bags, the bags should be left open or have holes cut into them to allow air to circulate.
Herb Drying Method 4: In dehydrators
Layer herbs on racks in an appliance designed to maintain air flow and control temperature. Dehydrators range from standard home food dehydrators (choose one with an adjustable thermostat) to larger, specially designed cabinets.
Herb Drying Method 5: In an oven at a very low temperature
Spread herbs on trays or oven sheets, and place in an oven that can be set to a temperature below 100 degrees Fahrenheit (gas ovens can be kept off with only the pilot light lit; the light bulb in some ovens may provide enough heat), and monitor for dryness. If needed, the oven door can be left ajar to increase air circulation and ensure that the temperature doesn′t rise too high.
Next time you′ve got an overabundance of fresh herbs on your hands, give one of these herb drying methods a try! And for more details on drying and the pros and cons of each drying method, along with a wealth of information on plant biology and ecology, botanical terminology, field identification, wildcrafting techniques, and more, sign up for the Botany & Wildcrafting Course, curated by the Herbal Academy′s team of expert herbalists and botanists.
Related News

Humans evolved to benefit from fermented foods

4 Foolproof Tips to Make Healthy Veggie Chips at Home

Legumes, nuts and kale can help you get big muscles

Five foods that can cause problems if consumed on an empty stomach!

3 Must Try Face Yoga Exercises For Glowing Face

Top 10 Unknown Beauty Tips and Tricks

Tips to Even your Skin Tone Naturally

4 Totally avoidable gym mistakes
Most Read
★10 Most Effective Weight Loss Exercises For Torching Fat
★Breakthrough drug restores more than 90% of lost hair in most patients
★Yoga Poses for People with Less Flexible Body
★Education can boost men?s chances of online dating
★Know why milk should be a part of your beauty regimen
★Skin tone linked to fruit and vegetable consumption
★Just ten minutes of play a day can help children reduce their risk of developing heart disease and diabetes later in life
★How to Make Elderberry Syrup
★Daylight Savings Time: That miserable time of year when many mourn loss of one-hour sleep
★Try these 4 simple yoga asanas to gain weight
★10 Ways To Use Sesame Oil For Beautiful Skin
★Top Natural Body Care Tips for Women
★Natural Herbal Gummies
★Study reveals alarming dangers of anti-ageing jabs
★Top Fitness Stars Share Their Most Common Workout Habits
★Best foods for healthy skin
★Natural Ways to Remove Blackheads on Face and Nose
★8 Time-Saving Meal Prep Ideas Nutritionists Actually Use
★Why You Need to Start Combining Avocados and Peaches
★Teenagers use social media posts to appear attractive to friends
★Numerous health benefits of bitter melon (uses , side effects)
★Learn How To Do Pearl Facial At Home To Get Naturally Glowing Skin Instantly
★5 Effective Baba Ramdev Yoga Asanas To Increase Height
★Dairy and vitamin D supplements protect against bone loss
★Those who consume fruit and vegetables have a 40% lower risk of an incurable lung disease
★5 Common Mistakes that May Ruin Your Skin
★How to exercise outdoors, when the smogs a killer
★A Beginners Guide to Sun Salutations
★Wash Your Face with Oil
★10 Weight Loss Tips to Make Things Easier (and Faster)
★How To Achieve The Perfect Nail Shape
★Mushrooms could prevent risk of Dementia, scientists say
★Medication Management Tips
★This Yoga Flow Will Instantly Boost Your Mood
★Daily consumption of tea protects the elderly from cognitive decline
★Five-second rule for food dropped on the floor approved by germ scientists
★Cooking in aluminium pans may be dangerous for your health
★Top 10 Fruits To Eat To Lose Weight Quickly
★Man has lived with giant neck for 13 years after going to doctors for help
★4 Foolproof Tips to Make Healthy Veggie Chips at Home
★Using Kalonji Seeds for Weight Loss
★Face Scrubs and Face Packs
★Weight-lifting and protein shakes rich in growth hormones may make you bald
★9 Simple Yoga Asanas & Tips for Weight Loss
★The health benefits of popular foods
★Can high heels give you cancer?
★10 Healthy Twists on Classic Diner Dishes
★Does ginger gene offer key to younger looking skin?
★How your make-up bag could wreck your health
★Tips to Even your Skin Tone Naturally
